after an update (don’t recall what and when) i recently started getting this error:
[export_ffmpeg.so] Could not find a FFMPEG codec for 'mpeg2video'.
[transcode] warning : (encoder.c) video export module error: init failed
[transcode] critical: failed to init encoder
[export_ffmpeg.so] Could not find a FFMPEG codec for 'mpeg2video'.
[transcode] warning : (encoder.c) video export module error: init failed
[transcode] critical: failed to init encoder
i found that libav received a stripped version in the official repository. so i checked the multiverse repos and they have the unstripped version there. so uninstall these packages:
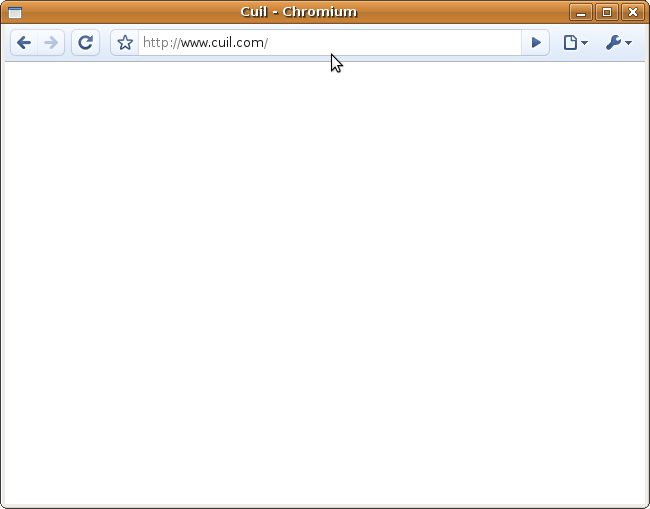
for everybody that’s wanted to try the google browser on your ubuntu machines there are repositories to get the pre-alpha version up and running in a few seconds.
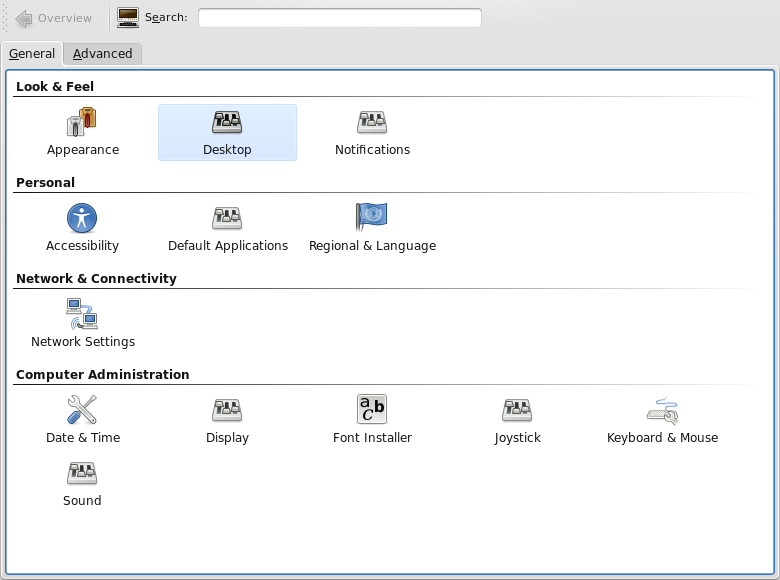
if you keep getting the annoying “Launching HTTP Cache Cleaner” in the panel on ubuntu 8.10 Intrepid Ibex while running amaroK or other KDE apps you’ll need the new kde4 systemsettings manager to hide this.
to get this to work just type: sudo apt-get install kdebase-workspace-bin systemsettings
and then run systemsettings
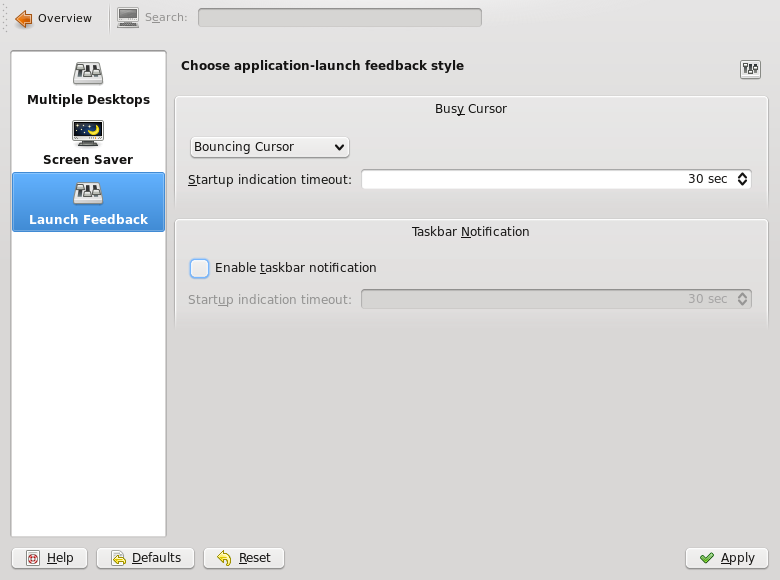
then this windows should popup
then click on desktop and you’ll see the notifications
just uncheck the “enable taskbar notification” part and you’re done!
[edit]
for those who don’t want to install this stuff you can also just edit the file: ~/.kde/share/config/klaunchrc
and set TaskbarButton=false
mine looks like this: [BusyCursorSettings]
Blinking=false
Bouncing=true
Timeout=30
since they’re tearing down the buildings in front of our office and there’s been a cool webcam positioned near the site i wrote a little script to get the images and wanted to convert them into a time-lapse…
here’s the knowledge i gained from this little experiment.
first i thought that image magick could do the trick, i noticed that to create a mpeg2 video i needed a little encode program that i found here.
compiled this and moved it to /usr/bin
then i executed convert in my image directory
convert -delay 10 *.jpg m2v:time_lapse-test.mpg
convert -delay 10 *.jpg m2v:time_lapse-test.mpg
the output was a nice little motion jpeg which i couldn’t use in my little video software called open movie editor (there’s probably better stuff out there but this is the first one i found and tried and seemed simple)
the important things here is setting the frames per second to 15 and the codec to mpeg4 with a bitrate of 2160000. everything else was gathered on different sites and really almost make no difference (in what you see at least)
so then i quickly edited movie… and saved it, it was way too big so encoded it again but this time with 2 passes and a smaller bitrate:
and here you have it (needs to be high quality because compressed it looks even worse)
[edit]
well youtube blocked my video saying that a copyright owner has claimed it owns some or all of the audio content in my video. oh well the music industry is just something you shouldn’t support! just don’t understand why you can’t have a little video online that even mentions the music at the end and might even bring a song to a wider audience!
i encourage everybody to use riaaradar before purchasing their next album!
well thanks to awf and his comment i checked out mythtv (the release-0-21-fixes branch) and applied this patch, compiled and it kinda works.
that was the short version, here’s the longer one:
check out mythtv svn co http://svn.mythtv.org/svn/branches/release-0-21-fixes/
download this patch right here and apply it from the mythtv folder using patch -p0 < mythtv_multiproto.5.patch
then make sure you've got all the qt3 development libraries, the XvMC development libraries aswell as LAME and all the others (don't quite remember the whole list) but if you compile you'll find out what your missing.
to configure i used awf's parameters described in his post ./configure --enable-xvmc --enable-dvb --disable-hdhomerun --disable-firewire --enable-xvmc-opengl --enable-opengl-video --enable-opengl-vsync --enable-proc-opt --extra-cxxflags=-I/path/to/mantis/linux/include --extra-cflags=-I/path/to/mantis/linux/include
of course don't forget to correct the path to the mantis driver build.
of course now make
sudo make install
then configure mythtv using mythtv-setup.
awf was nice enough to send me the dtv_multiplex table (which contains all the transport information for hotbird 13°E and astra 19.2°E) and so i went on to channel scanning... have all the hotbird channels... but can't scan astra eventhough i think i've got the disecq settings correct! if i look into the database it has my card and the inputs doubled, i can delete everything and it recreates them like that. soooo, a little help on the diseqc settings would be greatly appreciated ;)
of course if anybody want's the dtv_multiplex for hotbird and astra i'll gladly send it to you since it did help me out a lot! (of course if awf is cool with that)
thanks a bunch for the comments left here they helped out alot!
UPDATE: ok, got the astra channels scanned too. thanks to awf who pointed out Western union fees that i needed two video inputs (right now both set to EIT Western union fees that 's why i thought one wouldn't make a difference).
it scans ASTRA HD+ and ANIXE HD but it can't get a lock on both channels through mythtv. so the multiproto myth patch is still missing something or does anybody else have a good idea?
since i’m switching from my analog WinTV-PVR-500 to a DVB-S setup in my mythtv box I installed a TechniSat Skystar HD2 card (a rebranded Azurewave AD SP400 CI VP-1041) and to my surprise I got it running fairly quickly.
here’s a description on the first steps i took in creating a mythtv box with DVB-S and hopefully DVB-S2.
install mercurial (distributed version control system). In debian based systems: sudo apt-get install mercurial
then obtain the latest mantis multiproto drivers. there is no patching necessary for the card to run. hg clone http://jusst.de/hg/mantisthen compile and install. make
make install
the modules can be loaded manually but to test the correct loading a reboot is easier. now the card should be loaded at boot.
to create a channels.conf you’ll need scan from the dvb-apps located on linuxtv.org.
the way to get this working quite easy is described here. the TerraTec Cinergy S2 PCI HD CI is another clone of the same card.
make sure that the changed line in the Makefile has the correct path. in the example it is CPPFLAGS += -I/usr/src/mantis/linux/includebut since i compiled in my home directory my path was different (this is quite obvious but i thought i’d state it to be sure).
EDIT:i noticed that scan with the patch don’t work anymore… it should work just using the compiled scan in the dvb-apps/utils directory!
while running scan: ./scan dvb-s/Astra-19.2E > ~/.szap/channels.confcheck to see if these lines (or any stating: Using ‘STB0899 Multistandard’ DVB-S2) appear. ----------------------------------> Using 'STB0899 Multistandard' DVB-S2
Tune to frequency 11914500
DVB-S IF freq is 1314500
0x0006 0x0081: pmt_pid 0x0062 PREMIERE -- PREMIERE HD (running, scrambled)
0x0006 0x0082: pmt_pid 0x0063 PREMIERE -- DISCOVERY HD (running, scrambled)
0x0006 0x0084: pmt_pid 0x0065 BetaDigital -- ANIXE HD (running)
0x0006 0x0083: pmt_pid 0x0064 BetaDigital -- ASTRA HD+ (running)then you know that DVB-S2 is working also! yay!
afterwards i had 1187 services only on Astra 19.2E. half of them scrambled but hey, the numbers count ;)
now to test the whole thing enter the dvb-apps/test directory and try zapping to a channel (check in the ~/.szap/channels.conf to see which number is good to go and not scrambled). ./szap2 -r -n 085
the output will show you some channel data and as soon as “FE_HAS_LOCK” is displayed (keep szap running) open mplayer in a different terminal mplayer /dev/dvb/adapter0/dvr0
and you should see a picture! alright, the card is up and running!
all seems good but i still have a problem with DVB-S2. and that is as soon as i’m trying to display a DVB-S2 channel like ANIXE HD (channel #550 in my channels.conf) ./szap2 -r -t 2 -n 550i get a “FE_HAS_LOCK” but mplayer then just returns: TS file format detected.
VIDEO MPEG2(pid=1535) AUDIO A52(pid=1539) NO SUBS (yet)! PROGRAM N. 0
and that’s it…
i think i’m missing some codecs or something (w32codecs,DeCSS, x264, etc. is installed).
any help is appreciated though ;)
NOTE: don’t forget to add the option “-t 2†for DVB-S2 for szap
UPDATE: i noticed that when i zap to a HD station and wait long enough i get this error right after the “TS file format detected”: Too many audio packets in the buffer: (4096 in 7340032 bytes).
Maybe you are playing a non-interleaved stream/file or the codec failed?
For AVI files, try to force non-interleaved mode with the -ni option.
MPEG: FATAL: EOF while searching for sequence header.
Video: Cannot read properties.
so i’m still unsuccessful at watching HD tv.
UPDATE 2!!: to watch HD tv stations you need the option -p when calling szap2! -p : add pat and pmt to TS recording (implies -r)
so try ./szap2 -r -p -t 2 "ASTRA HD+" and open mplayer… wow
my 3GHz system that’s gonna be the mythbackend sometimes quits with mplayer saying: ************************************************
**** Your system is too SLOW to play this! ****
************************************************which means… my frontend system is gonna have to be upgraded!
well ubuntu out of the box doesn’t support amr sounds often found in mobile phone videos. the problem is that ffmpeg isn’t compiled with amr support… medibuntu has a version compiled with amr support, so….
add a medibuntu repository file: sudo wget http://www.medibuntu.org/sources.list.d/hardy.list -O /etc/apt/sources.list.d/medibuntu.list
this creates a new source list in the sources.list.d folder and leaves your main source file unchanged.
then also add the GPG key: sudo apt-get update && sudo apt-get install medibuntu-keyring && sudo apt-get update
since firefox is getting slower each day the developers code. i started using epiphany instead.
it has some cool features like the “Smart Bookmarks” which i have configured to be some sites in my toolbar that i can directly enter the search term. in the bottom screenshot you see an example wikipedia search and how it is set up. smart bookmarks are even smarter though, check out some samples they have on the galeon website.
since the gecko engine has gradually made me sicker and sicker i decided to recompile my epiphany browser with webkit. woohoo! so i followed the howto here.
after installing libxslt-dev and the gstreamer development packages (libgstreamer-plugins-base0.10-dev and libgstreamer0.10-dev) which solved my dependency problems i compiled WebKit/GTK+ from the svn source with the option –enable-video just for the heck of it.
running the very simple browser found under ./Programs/GtkLauncher i receive the user agent Mozilla/5.0 (X11; U; Linux i686; en-us) AppleWebKit/525.1+ (KHTML, like Gecko, Safari/525.1+) lt-GtkLauncher
to fix the glib requirement version >= 2.15.6 i just installed glib from the hardy repositories. then compiled epiphany with the option –with-engine=webkit.
now if i check the user agent i get: Mozilla/5.0 (X11; U; Linux i686; en-us) AppleWebKit/525.1+ (KHTML, like Gecko, Safari/525.1+) epiphany
and i’m finishing this post right here with epiphany/webkit.
a fun little experiment but it seems it’s just not ready to actually use on a everyday surfing basis!
some things that don’t work:
well you’ve gotta love ace archives, there’s actually still people using it ;)
i received one today and wenn trying to unace in my linux i get (with t as parameter to verify the archive): munzli@freddy:~$ unace t archive.ace
UNACE v1.2 public version
Processing archive: archive.ace
Authenticity Verification:
created on 31.3.2002 by Laudahn
thefirstfile.txt
Analyzing
File compressed with unknown method. Decompression not possible.
Error occurred
well after searching around i found out that there is a nonfree version of unace. how handy. it’s located in the multiverse repository of gutsy and can be installed with: sudo apt-get install unace-nonfree
now you’ve got the unace version that will decompress my archive and another version named “unace-free”. i’m not sure why they named it the other Moneygram fees way around in the repos, but it works…